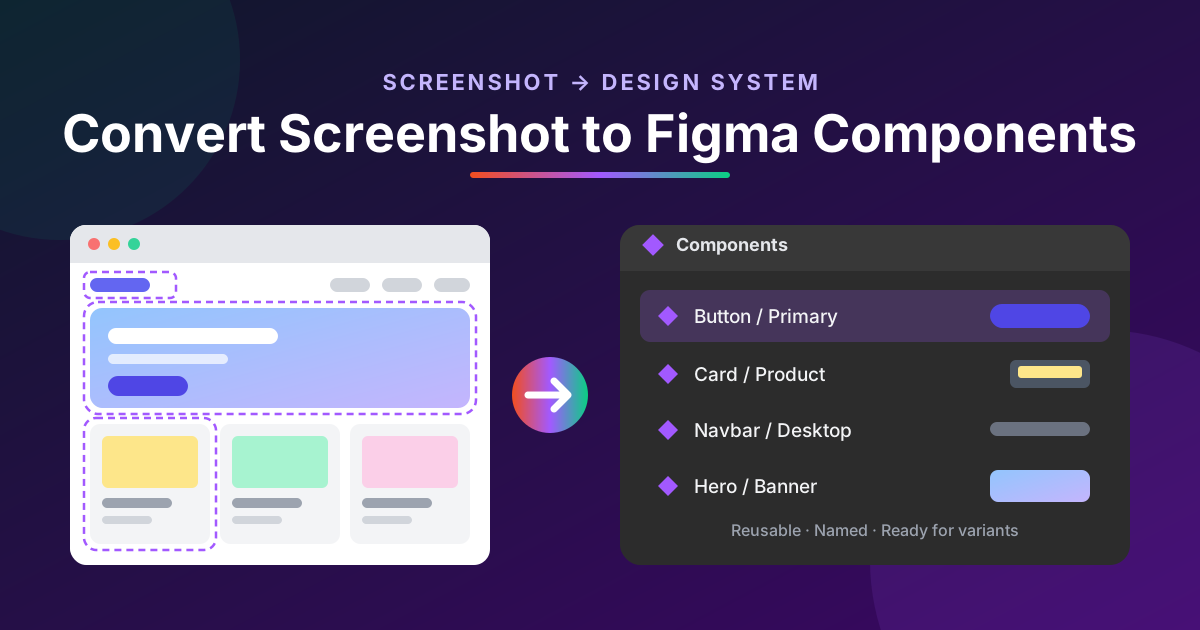
Turning a screenshot into a professional, editable design is a common challenge for UI and UX designers. A screenshot may show a polished website, mobile application, dashboard, or landing page, but its visual elements are usually flattened into a single image. Editing individual buttons, headings, cards, and navigation elements is not possible until the interface is recreated.
Learning how to convert screenshot to Figma components can make this process faster and more efficient. Instead of rebuilding every element from scratch, designers can use AI-powered conversion tools, image recognition, and Figma’s design features to recreate layouts and turn repeated elements into reusable components.
This workflow is valuable for web designers, product teams, developers, freelancers, and businesses that need to transform visual references into editable UI designs.
In this guide, you will learn how screenshot-to-Figma conversion works, how to create reusable components, which tools and features matter, and how to improve the accuracy of the final design.
What Does It Mean to Convert a Screenshot to Figma Components?
Converting a screenshot to Figma components involves recreating a flat image as an editable interface and organizing its reusable elements into components.
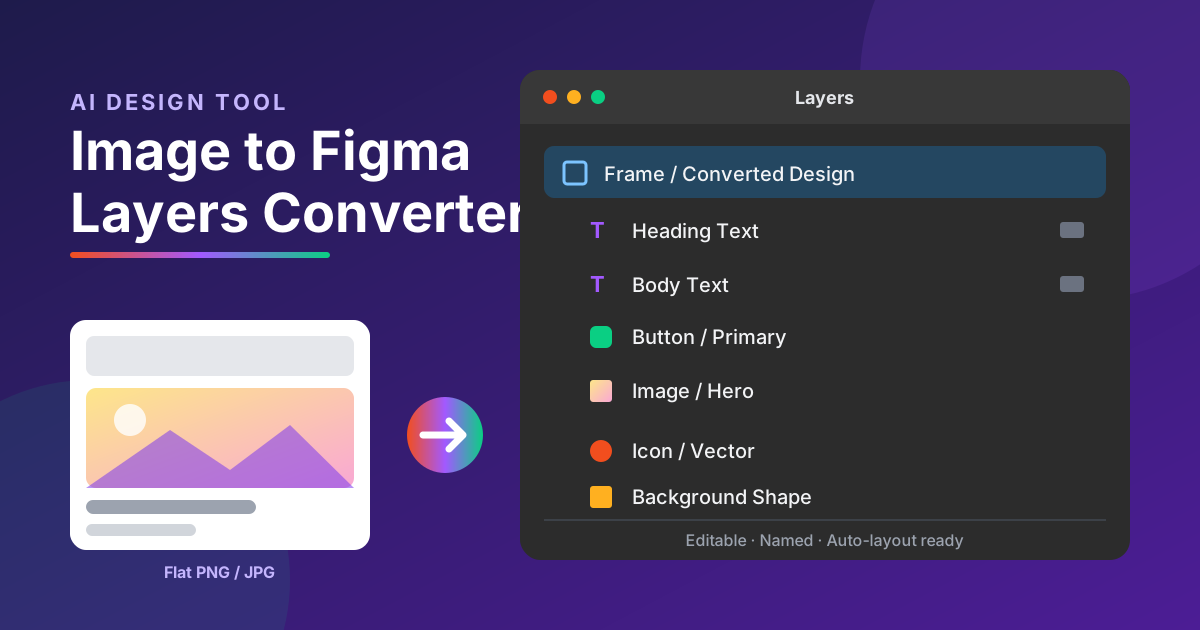
For example, a website screenshot might contain a navigation bar, logo, search field, call-to-action button, product cards, and footer. In the original image, these elements are not independently editable.AI Screenshot to Figma Converter
After recreating the interface in Figma, you can separate the elements into layers and convert recurring elements into reusable components.
Understanding Figma Layers and Components
Layers are individual objects that make up a design. They can include text, images, shapes, frames, and other elements.
Components are reusable design objects that help maintain consistency across a project. When you create a component for a button, you can reuse it across multiple screens. Updating the main component can also update its instances, depending on the changes and overrides applied.
For instance, a designer creating an e-commerce website might build a product card component with an image, product title, price, rating, and purchase button. That component can then be reused throughout the website.
Why Screenshot Conversion Requires More Than Importing an Image
Importing a screenshot into Figma does not automatically make its contents editable. The screenshot remains a flat image unless you recreate or convert its individual elements.
A proper conversion workflow aims to identify visual elements, rebuild the layout, and establish a logical layer hierarchy. The next step is to turn repeated elements into components that can be maintained and reused.
AI tools may automate parts of this process, but their output still requires inspection and refinement.
Benefits of Converting Screenshots Into Figma Components
1. Save Time During UI Recreation
Rebuilding an interface manually can involve measuring margins, matching colors, selecting fonts, drawing shapes, and positioning individual elements.
Screenshot-to-Figma tools can help automate some of these tasks. They may recognize text, buttons, images, and containers, providing a starting point for further editing.
This is especially helpful when working with multiple website references or recreating complex dashboards.
2. Create Consistent Design Elements
Reusable Figma components help maintain visual consistency throughout a project. If several pages use the same button, navigation bar, or product card, a shared component reduces the need to update each instance separately.
This becomes increasingly valuable as a design system grows.
3. Improve Collaboration
Editable Figma files are easier to share with designers, developers, product managers, and clients than static screenshots.
Team members can review individual elements, suggest improvements, and work with a structured design rather than relying entirely on a flattened image.
4. Support Faster Prototyping
Once a screenshot has been recreated as editable UI elements, designers can explore alternative layouts, replace content, test different colors, and connect screens using Figma’s prototyping features.
This helps teams move from visual references to interactive concepts without rebuilding everything for each experiment.
How to Convert a Screenshot to Figma Components
There are several ways to recreate a screenshot in Figma. The best method depends on the image’s complexity, the required level of accuracy, and the available tools.
Step 1: Prepare a High-Quality Screenshot
Start with a clear screenshot of the website, application, or interface you want to recreate.
High-resolution images generally make it easier to identify small text, icons, borders, and spacing. Avoid blurry images, excessive compression, and screenshots containing unnecessary browser controls when possible.
If you are recreating a complete website page, determine the relevant viewport dimensions before starting.
For example, a desktop landing page and a mobile application screen require different frame sizes and layout decisions.
Step 2: Import the Screenshot Into Figma
Create a new Figma design file and add a frame that matches the screenshot’s dimensions.
Import the image into the frame and position it accurately. Treat it as a visual reference rather than the finished design.
You can reduce the image’s opacity or lock the reference layer to prevent accidental movement while recreating the interface.
Step 3: Use an AI Screenshot-to-Figma Tool
AI-powered design tools can analyze screenshots and attempt to reconstruct their contents as editable elements.
Depending on the tool, this process may identify headings, paragraphs, buttons, navigation sections, images, and other interface components.
Some tools support direct Figma integration, while others generate a compatible output that requires importing or additional processing.
Before selecting a tool, check whether it creates editable layers or simply places the original screenshot inside a design file. This distinction is important because a visually similar result is not necessarily an editable design.
Step 4: Recreate the Main Layout
Once the initial conversion is complete, inspect the overall layout.
Start with the largest sections, including the header, hero area, content sections, sidebars, cards, and footer. Use frames to organize these areas logically.
Then refine the spacing, alignment, typography, and dimensions of individual elements.
Working from the overall structure toward smaller details usually produces a more organized result than adjusting every element randomly.
Step 5: Separate Individual UI Elements
Check the Layers panel to determine whether the converted interface contains separate objects.
Headings should ideally be editable text layers, buttons should have their own shapes and labels, and images should remain independently replaceable where appropriate.
If multiple elements have been merged into one image, recreate the necessary parts manually.
Use descriptive layer names such as “Primary Button,” “Navigation Menu,” “Product Image,” and “Section Heading.” Clear naming makes the design easier to understand and maintain.
Step 6: Turn Repeated Elements Into Components
After separating the elements, identify objects that appear multiple times or need consistent styling.
Select a button, card, navigation item, or other reusable element and create a component using Figma’s component functionality.
For example, an online store might need several product cards with the same structure but different images, names, and prices. Creating a product card component allows designers to reuse the structure while customizing supported properties.
Avoid turning every individual layer into a separate component. Components are most useful when an element is reused, requires consistent behavior, or forms part of a shared design system.
Step 7: Organize Components and Variants
Organize reusable components into logical groups. A small design system might include buttons, form fields, navigation elements, cards, icons, and modal windows.
Use component variants when a component needs clearly defined alternatives, such as primary and secondary buttons or default, hover, and disabled states.
For interactive elements, ensure that the component’s variants reflect the states required by the design.
Step 8: Review the Final Design
Compare the recreated interface with the original screenshot.
Check typography, element sizes, spacing, colors, image cropping, and alignment. Inspect the component hierarchy and confirm that repeated elements are using the intended components.
Finally, test the layout at relevant screen sizes. A screenshot captures only one visual state, so responsive behavior and interactive states may need to be created separately.
Best Features to Look for in a Screenshot-to-Figma Tool
Not all tools produce the same quality of output. Consider the following capabilities before choosing a solution.
AI-Powered UI Recognition
A useful tool should recognize common interface patterns, including headings, buttons, images, cards, navigation menus, and form fields.
Accurate detection can reduce manual reconstruction, although complicated layouts may still require substantial editing.
Editable Text and Vector Elements
Look for tools that recreate text as editable text layers and simple graphics as editable shapes or vectors where possible.
If the result contains only a flattened image, you will still need to rebuild most of the interface manually.
Organized Layer Structure
A good conversion result should provide a logical hierarchy of frames, groups, and individual elements. Poorly organized layers can make even an accurate-looking design difficult to edit.
Component and Auto Layout Support
Component creation helps standardize repeated elements, while Auto Layout can make interfaces easier to maintain as content changes.
Some converters may generate structures compatible with these features, but complete automatic reconstruction should not be assumed. You may need to apply Auto Layout and component settings yourself.
Reliable Figma Export
Check whether the tool supports direct transfer to Figma, a plugin-based workflow, or an importable file format. Also review pricing, export restrictions, file-size limits, and privacy policies before using it with confidential material.
Common Mistakes to Avoid
Treating a Screenshot as a Complete Design System
A screenshot shows appearance, not the underlying design rules. It does not reveal the original spacing tokens, component properties, responsive breakpoints, or interaction logic.
Create these elements intentionally instead of assuming they can be recovered automatically.
Creating Too Many Components
Converting every shape or text layer into a component can make a file unnecessarily complicated.
Focus on reusable patterns and elements that benefit from consistent updates. Keep unique content as ordinary layers unless there is a practical reason to make it reusable.
Ignoring Typography and Spacing
Even a well-reconstructed layout can look noticeably different if fonts, line heights, margins, and padding are inaccurate.
Compare the result with the reference image and correct these details before finalizing the component library.
Forgetting Responsive Design
A screenshot represents a specific viewport and does not explain how the interface behaves on smaller screens.
Use appropriate frames, constraints, and Auto Layout where suitable. Create separate responsive adjustments when needed rather than assuming the original layout will automatically adapt.
Skipping Component Testing
A component may look correct in isolation but behave poorly when its text becomes longer or its content changes.
Test reusable cards, buttons, and form elements with different content and component variants before applying them across a larger project.
Practical Tips for Better Screenshot-to-Figma Results
To improve conversion quality, use these practices:
- Choose screenshots with clear text and well-defined interface boundaries.
- Rebuild the largest layout sections before refining small details.
- Use consistent spacing and typography styles.
- Create components for repeated UI patterns.
- Use Auto Layout when elements need to adapt to changing content.
- Keep component names and layer names descriptive.
- Compare the final design against the reference before delivery.
- Check that you have the necessary rights to reuse the reference assets and design.
These steps help transform a quick conversion into a maintainable design file.
Who Can Benefit From This Workflow?
UI and UX designers can use screenshot conversion to explore layouts and speed up interface recreation.
Web developers can use editable mockups to discuss implementation details and communicate design requirements.
Freelancers and agencies can accelerate early design work and create reusable components for client projects.
Product teams can turn visual references into prototypes for design reviews and usability discussions.
Design students and beginners can study interface structure and practice recreating common UI patterns in Figma.
The workflow is particularly useful when the goal is to learn from a reference or establish a starting point. It should not replace original design decisions, accessibility checks, or user research.
Conclusion
Learning how to convert a screenshot to Figma components helps designers move from static visual references to editable, reusable interface designs. By combining screenshot analysis, AI-powered conversion, manual refinement, and Figma’s component features, it is possible to reduce repetitive work and build more consistent UI projects.
The most effective process begins with a clear screenshot, establishes the main layout, separates individual elements, and converts repeated patterns into reusable components. Careful attention to typography, spacing, layer organization, and responsive behavior improves the final result.
Remember that automatic conversion is a starting point, not a guarantee of a production-ready design. Review the generated layers, correct inaccuracies, and build a component structure that supports future changes. This approach makes screenshot-based design work faster, more flexible, and easier to maintain.


One thought on “Convert Screenshot to Figma Components: A Complete Guide”