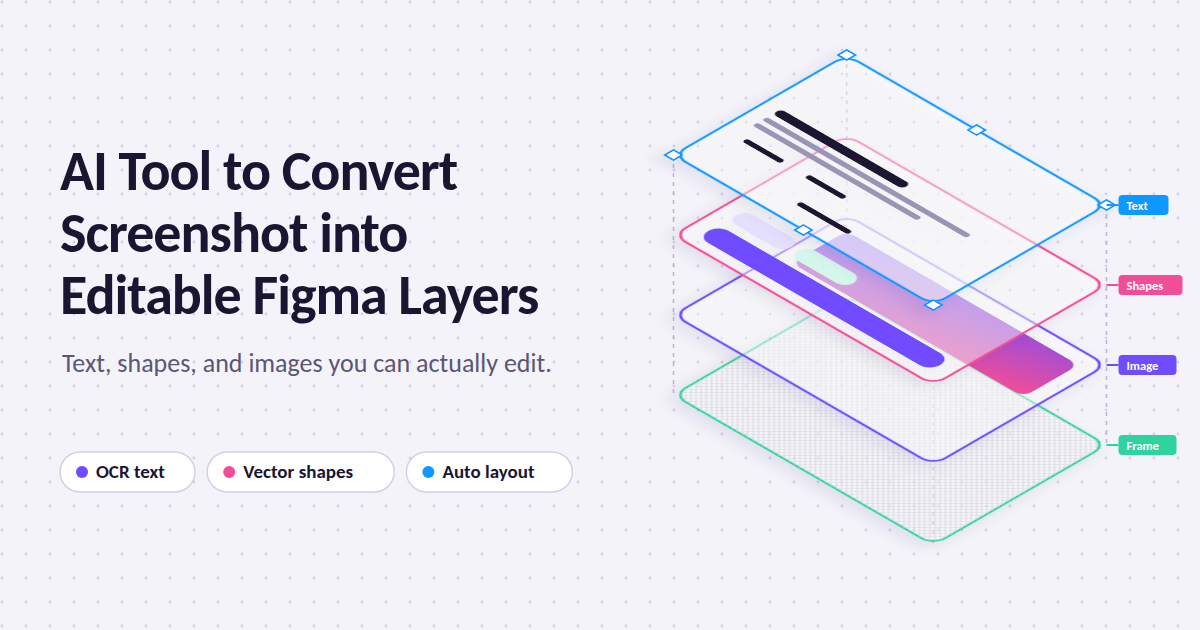
A screenshot is a dead end. You can look at it, annotate it, and paste it into a deck, but you can’t change a single word inside it.
That’s a real problem when the screenshot is all you have. Maybe the original design file was lost, or a developer shipped a screen nobody documented. This is where an AI tool that converts a screenshot into editable Figma layers earns its place.
What “Editable Figma Layers” Really Means
Not every conversion is equal. Some tools simply place your image on the canvas and call it done. A proper conversion rebuilds the screen from parts.AI Screenshot to Figma Converter
Live Text Instead of Pixels
Headlines, labels, and buttons should come back as real text layers. You can then change the copy, adjust the size, and swap the typeface without redrawing anything.
Vector Shapes and Clean Fills
Cards, dividers, and buttons should become rectangles and ellipses with defined fills, strokes, and corner radii. That lets you restyle them in seconds.
Logical Structure
The best output groups related items together. An icon and its label travel as one unit, and spacing is handled by auto layout rather than guesswork.
How the AI Rebuilds a Flat Image
The process feels like magic, but it follows a fairly predictable sequence.
Step One: Finding the Pieces
A vision model scans the image and marks where each element begins and ends. Buttons, input fields, icons, photos, and containers are separated from the background.
Step Two: Reading the Words
Text recognition pulls out every string and estimates its size, weight, and color. Font identification is the weakest link here, so expect close matches rather than exact ones.
Step Three: Guessing the Structure
Finally, the model infers hierarchy. It decides which elements belong in the same row, which sit inside a card, and where spacing repeats. This is the stage where tools differ most, and it determines how much cleanup you’ll face later.
A Simple Workflow You Can Follow
You don’t need a complicated setup. Most tools work as a Figma plugin or a browser app.
- Capture the screen at high resolution. Sharp edges give the AI more to work with.
- Crop to a single screen. One frame per upload keeps the output manageable.
- Run the conversion. Wait for the layers to appear in your file.
- Audit the layer panel. Look for missing text, merged shapes, or odd groupings.
- Fix fonts and colors. Replace guessed typefaces and match brand values.
- Componentize repeated parts. Turn buttons, cards, and list rows into reusable components.
Spend most of your time on steps four to six. That’s where a rough draft becomes a dependable file.
Features Worth Checking Before You Choose
Marketing pages all promise the same thing. These details separate the useful tools from the frustrating ones.
- Text accuracy: Test it with small type and non-English characters.
- Layer naming: Meaningful names such as “Primary Button” save hours compared with “Rectangle 214.”
- Icon handling: Vectorized icons are far better than cropped bitmaps.
- Auto layout output: Check whether the result stretches properly when you change the content.
- Style extraction: Some tools generate color and text styles automatically.
- Export options: Look for support for multiple frames and different screen sizes.
- Data handling: Find out whether uploaded images are stored or used for training.
Run the same screenshot through two or three tools. The differences become obvious very quickly.
Where This Technology Helps Most
Recovering Lost Design Files
When a project changes hands, source files sometimes vanish. Converting live screens back into layers gives the team a starting point without a full rebuild.
Auditing an Existing Product
Designers often need to document every screen in an app before a redesign. Editable layers make it easy to mark inconsistencies, such as five slightly different button styles.
Studying Competitor Patterns
Product teams analyze how other apps handle onboarding, checkout, or settings. Working with editable frames makes side-by-side comparison far easier than juggling image files.
Speeding Up Prototypes
Capture a real screen, convert it, adjust a few elements, and link frames together. A clickable demo can be ready before lunch.
Teaching and Learning
Beginners can dissect professional interfaces to see how spacing, alignment, and hierarchy are built.
Where AI Still Falls Short
Honesty matters here, because these tools have limits that can waste your time if you don’t expect them.
Complex visuals cause trouble. Blurred backgrounds, layered transparency, and busy photography often produce messy shapes.
Custom fonts are another weak point. The AI sees pixels, not font files, so a unique brand typeface will almost always need to be replaced by hand.
A screenshot also freezes a single moment. Hover effects, error states, and dropdowns won’t exist unless you capture each one.
Finally, the structure is a best guess. The AI doesn’t know how the original designer built the screen, so you may need to rearrange groups to match your own conventions.
Tips for Cleaner Results
Small habits make a big difference.
- Turn off browser extensions and remove cursors before capturing.
- Use the actual device resolution rather than a scaled-down copy.
- Capture light and dark themes as separate images.
- Avoid screenshots with overlapping modals unless the modal is the subject.
- Rename the top-level frames right after import so your file stays navigable.
- Save a copy of the original image in a hidden layer for easy comparison.
That last tip is underrated. Overlaying the original at 50 percent opacity quickly reveals tiny spacing errors.
Is It Safe to Upload Your Screens?
Think before you upload anything sensitive. A screenshot may contain customer names, internal metrics, or unreleased features.
Read the tool’s privacy policy and look for clear statements about storage and retention. If you work under a non-disclosure agreement, confirm with your team whether outside tools are allowed. When in doubt, blur personal information before converting.
There’s also the matter of originality. Rebuilding a competitor’s interface for research is common practice, but presenting that layout as your own work can create legal and ethical problems. Borrow the thinking, not the exact visuals.
Frequently Asked Questions
Can AI convert any screenshot into Figma layers?
Most clean interface screenshots work well. Highly stylized artwork, heavy gradients, and low-resolution images tend to produce weaker results.
Will the fonts match exactly?
Usually not. The tool will suggest a similar typeface, and you’ll adjust it manually if the exact font matters.
Do I still need to know Figma?
Yes. The AI creates a first draft, but you’ll need to fix groupings, apply auto layout, and build components yourself.
Is the output good enough for developer handoff?
Only after review. Treat it as a reference file, then tidy the structure, naming, and spacing before sharing it.
How long does a conversion take?
Simple screens finish in seconds. Dense dashboards may take a minute or more.
Final Thoughts
An AI tool that converts a screenshot into editable Figma layers won’t design anything for you, and that’s fine. Its real value is removing the dull work of tracing rectangles and retyping labels.
Start with sharp images, check the output with a critical eye, and invest your time in structure and consistency. Used this way, a flat picture becomes a working file in a fraction of the usual time, leaving more room for the design decisions that actually matter.

2 thoughts on “AI Tool to Convert Screenshot into Editable Figma Layers: A Practical Guide”